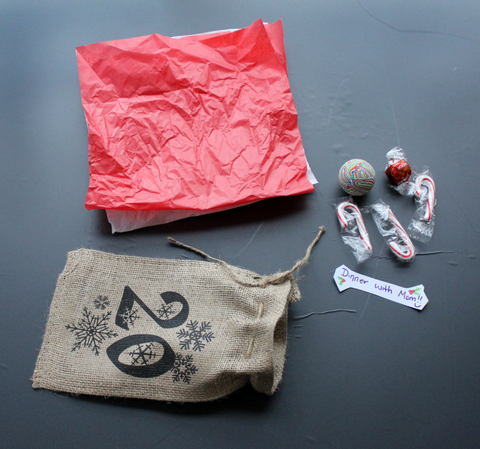
Burlap Advent Calendar Bags

Advent is here and for some that means those cardboard calendars with tiny pieces of kind of disappointing chocolate inside - and those are cute and all but, c'mon, we can do better than that. These beautiful burlap Advent calendars are so easy to make and the best part is that you can fill them with anything, not just candy! I'll show you how! Here's what you'll need to make the bags:

- 24 Burlap drawstring bags. You can find the same ones I used here.
- 12 Sheets of NuFun Activities Light Fabric Transfer Paper (you can print 2 numbers per sheet)
- Scissors
- Iron
- Printer
- Start by printing your numbers. Download my Free Printable Burlap Advent Calendar Numbers here. If you use my numbers, they are already mirrored! If you use your own, remember to mirror or flip them before printing! We found these numbers on All Free Downloads!

- Cut around the numbers using round edges. The numbers tend to look much better when cut without jagged edges.

- Place the number face down on the center of the bag and iron.

- Peel the backing paper while it is still HOT.

- Bask in the glory of the burlap transfer - and then do the next twenty three days of transfer.

- Now to fill and wrap them. You can get creative with this by filling with candy, small toys or my personal favorite - coupons to do things with parents! Lovvveeee!

- Wrap in tissue paper and tie the drawstrings.
- Hang on a staircase, mantle, your Christmas tree or even keep them simply in the window or on the shelf! Kids love being able to find their unique surprises inside these burlap advent calendar bags and you don't have to suffer through looking at an eyesore all season long!


